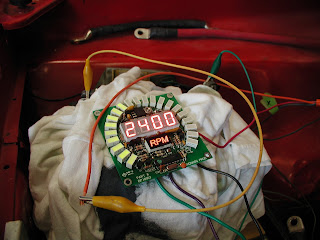
I have now implemented that plan and have a working tach. I first decided to make life easy and pulled 9 batteries out of the front of the car. This gave me good access to the front of the motor.
 The pieces I used to generate the tach signal were all removed from a 70's era Mopar distributor that I had in my stash of Muscle Car parts. This was the easiest and cheapest solution to the problem, since a distributor similar to this one was successfully generating the tach signal while the internal combustion engine was in the car. Figuring out how it did that was actually pretty simple.
 I just replicated the sensor configuration from inside the distributor onto the front motor shaft. Proper alignment was pretty critical here so I am glad I took the time and effort to remove some batteries. One modification I had to make was to grind off four of the teeth from the sensor gear.
 This was necessary because the gear originally generated 8 pulses per revolution of the distributor. An internal combustion engine has two revolutions per one revolution of the distributor. Therefore, four pulses equates to one revolution of the engine (or electric motor). The gear also needed to be bored out slightly to fit on the motor shaft.
 Once the sensor unit was satisfactorily mounted, I connected it to the original ECU (electronic control unit). This unit was necessary to properly process the pulses generated by the sensor into something able to be read by the tachometer.
 Of course I wanted to test it before lifting 600 pounds of batteries back into the car. I disconnected the motor from the controller and hooked up a 12 volt car battery to it - the same way I originally tested the motor. I connected a spare tachometer to my accessory 12v battery.
 The test was a success. All I have to do now is run the sensor wire to the in-dash tach.
1 comment:
Congrats on the Duster project, it is proving successful :-)
Post a Comment