Sunday, November 30, 2008

November Sucked!

The month of November began with me working very hard to get the Duster ready to test drive. For some reason, things started to turn against me.

First I discovered that one of my main contactors was defective. Because of the slow response from the vender it took quite a while just to purchase a replacement. I still have not heard anything back on the defective one I returned to them.

After I installed the replacement contactor, I encountered the perplexing problem of voltage from my 156 volt battery pack finding its way into the chassis of the car. It took a full day to finally diagnose and rectify that little issue. The cause was my steel battery restraints that I had worked extremely long and hard to fabricate and install. I removed most of them to alleviate the problem but will still have to correct them in the future.

So I finally got to a point where I was satisfied that everything was working correctly and safely, and took my first test drive. Of course that is the day I discovered (with a bang) that LogiSystems had been sending out defective controllers. That unit has been sent back to LogiSystems but I am still uncertain if they have corrected the issue with their product that precipitated this disaster. I have made no decision yet as to how to proceed. Rather than spend another $1600, I am giving LogiSystems a little time to make things right if they can.

If November wasn't bad enough already, I capped the month off with a mistake purely of my own making. I had already connected my Manzanita Micro battery charger but had never used it. Being in 'waiting mode' I wanted to at least charge my battery pack. I plugged it into a 120 volt outlet and the charger came alive. However it wasn't putting out any voltage.

In trying to diagnose the problem, I wanted to verify that I had at least connected it correctly. I went through all of my documentation and absolutely could not find any paperwork or instructions on which DC wire was which. I had connected it a while back and could not remember why I connected it the way I did. Even though I had already downloaded several files pertaining to this charger, not one of them instructed which DC wire was positive and which was negative.

I had to go online again and find and download another file at the Manzanita Micro website. Then I had to find a way to open the file since my computer did not have Microsoft Word installed on it. Finally, after quite some time I found what I suspected. Yup, I had connected the DC leads backwards. In this installation file, I also found the words "...something will be destroyed in either the car or the charger. The charger warranty does not cover this installation error".

Oh crap! I have been so careful and deliberate on this project, I don't know HOW I could have made such an idiotic mistake.

Of course my phone call and email to Manzanita Micro have not yet been returned, since this occurred on the Friday after Thanksgiving. Interestingly, I also found this on the newly downloaded installation and setup file: "The charger is protected from reverse polarity installation by an internal fuse". Hmmm, that's kind of contradictory to their prior statement of "something will be destroyed". Maybe what it means is that I have to send it back to them, wait weeks and spend hundreds of dollars for them to replace an internal fuse!

I'm so glad this is the last day of November. I am not going anywhere near the damn car today.

Monday, November 24, 2008

Update on Failed Controller Problem

I am faced with a few choices to get the Duster back on the road.
  1. Stick with LogiSystems and hope they can send me a working controller
  2. Purchase a Kelly controller rated for 156 volts
  3. Remove 2 batteries and purchase the industry standard Curtis 144 volt controller
Choices #2 and #3 would cost me over $1500. Choice #1 may never occur.

I called LogiSystems Controllers this morning. I was told that they have a redesigned board that they are currently testing. If testing is successful, they will have more of the boards produced and repairs to defective controllers will be their first priority. Repairs will consist of putting entirely new components into the existing case and should take 2 weeks.

I did hear from another source that LogiSystems has been trying to solve controller "issues" for over a year. Still, because of the amount of money involved, at this moment I am inclined to wait at least until I find out how the testing goes at Logisystems before spending another chunk of cash.

I guess I can wait a few weeks. There is no real reason I need the car on the road at this time. Winter is almost upon us so I would not likely be driving it too much. In addition, I still have other work to do on the car to complete the conversion.

Friday, November 21, 2008

I drove my EV Duster for the first time today...then...

KABOOM!

I hadn't planned on test driving the car today. However, this morning after I hooked up the Link-10 meter and finished all of the testing I wanted to do, I had some extra time and enthusiasm before work. So I thought "What the hell".

The first clue that something might go wrong was when I tried to pre-charge the capacitors in the motor controller. This is done by connecting a resistor of some kind across the contactor to let a limited amount of current slowly charge the capacitors - as opposed to sending a large inrush of current at them by stepping on the throttle. Many people use a standard light bulb for this, which is what I used today. However it did not work as planned. The light bulb is supposed to light and slowly go out as the charge current decreases. My light bulb stayed lit. Hmmm.

I have been very cautious with this project and I continued that approach today. For the first test of the motor, controller and drive train at 160 volts I jacked the rear wheels off the ground. I went ahead and switched on the main contactor, energizing the controller. I lightly stepped on the accelerator pedal and everything worked as expected. Exciting!

Well, there was nothing left to do at that point but take it for a drive. I pulled the jack out of the way, jumped in and put her in reverse. The throttle was a little touchy - as I had been told to expect. It took very little pressure on the pedal to get the car moving. I got the feel of it right away as I backed into the street. I put the 3-speed manual transmission into second gear and pulled slowly forward. Everything was very smooth. It felt just like driving the Duster as before. I drove slowly about 50 yards to the neighbors house, pulled into their driveway and turned around. I again put it into second gear and drove back to my house. At that point, I shut everything down and proceeded to check everything. I used my infrared thermometer to check for anything abnormally hot. All appeared fine.

I then took a short break and contemplated parking the car so I could get ready for work. But the lure of a more rigorous test drive got to me. So OK, one more drive and then I'll park it for the day. I backed out of the driveway and headed down the street. I accelerated more on this drive, smoothly hitting 26 MPH before letting off. I coasted to a stop in another neighbor's driveway a few houses down the street.

At this point came another clue that all was not well. A strange noise emanated from under the hood. The best I can describe it is that it sounded like cards dragging against a bicycle spoke. I went ahead and backed out of the driveway and headed back toward my house. I stepped on the pedal but there was noticeably less acceleration than before. My first thought was that the batteries had run too low - although they had a 70% charge when I began this excursion. I stepped a little further on the accelerator pedal - still sluggish. Then I pushed down a little further and BANG! I felt something hit the firewall or the underside of the car, and heard something hit the pavement as the car slowed to a stop.

I immediately thought that it was a mechanical failure. In fact, I thought my motor-to-transmission coupling had broken. I got out and walked back to see what had fallen off of the car. All that was in the street was a 2 inch by 3 inch piece of thick green plastic. Hmmm. I have been over every inch of this car and I have never seen anything like that on it. I almost tossed it, but decided to hang onto it just in case.


When I walked back to the car I detected the distinctive smell of an electrically burned (or burning) device. Again, hmmmm.

I popped the hood to take a look, prepared to do battle with flames. (BTW, I had taken my fire extinguisher with me). I didn't have to look too hard to find that the end of the motor controller case - the end facing the firewall - had blown completely out. Interestingly, the fragments of the end piece that were remaining in the car were a thick green plastic material. So that mystery was solved. I am guessing that the cards-against-spokes sound was high-amperage arcing inside the controller before it blew up.

In a way, I was relieved to find that it was a component failure instead of something that I had installed incorrectly or wired wrong. That sense of relief quickly faded however.

Earlier this week I had tried to examine the tiny adjustment screws inside the controller case - just for future reference. I wasn't able to see any adjustment screws so I gave Steve Clunn from Grassroots EV a call, as I had purchased my motor and controller from them. (BTW, Steve and his partner Jon Hallquist have always been very accessible and helpful.) During that conversation Steve told me that they had been experiencing a very high failure rate with these Logisystems controllers. In fact, it had been so extensive that Grassroots had stopped selling Logisystems.

Upon speaking with both Steve and Jon after my controller failure today, I found out the true extent of the problem with Logisystems. Logisystems are in a mess. No new controllers are being shipped out. Many of the ones they previously shipped have blown up. They produced an upgraded controller that had a higher failure rate than the one it replaced. Failed controllers are not being fixed and sent back. Logisystems has apparently been full of promises but has not delivered on any. At least one customer has filed suit against them.

This isn't good. The reason I purchased the Logisystems in the first place was that they were the only controller in this price range advertising a unit good for 156 volts. With my heavy conversion I wanted to stay with 156 volts. Now I have the distinct feeling that I will never see a repaired controller if I send this one back to Logisystems. Grassroots will not/cannot refund my $1345.00. I am currently sorting out my options.

The one positive thing about today is that I now know I have an electric vehicle ready to roll if I can come up with a motor controller.

Wednesday, November 19, 2008

Encountered an Interesting Problem

Today I was planning to take my first electric test drive. In preparation for that, I began final testing of everything as I powered up the system. At some point I realized that the battery pack voltage was somehow getting into the chassis of the vehicle. The battery pack is completely isolated from the car so that is not supposed to happen. I stopped the testing and went about trying to solve this problem.

After spending quite a bit of time disconnecting all of the likely suspects - battery charger, DC-DC converter etc. - I was still unable to discover how the battery pack voltage was getting to the chassis.

Finally I remembered something that I had read awhile back. Sometimes a light coating of electrolyte on the top of the batteries will provide a path for battery current to get to the automobile frame. I tried cleaning the top of the front battery pack with baking soda and water. Although that didn't solve the problem, I saw fluctuations in the wayward voltage. From that I correctly surmised that my battery restraints were the culprits. Because of the obstructions on the ends of the batteries, I had run the steel very close to the cells on the front batteries. Recently I had noticed some corrosion starting to occur, even though I had coated them with rubberized undercoating. This was enough to conduct electricity to the steel restraints.


I completely removed the restraints and the problem was solved. WELL ALMOST. When I reconnected the rear battery pack to the system, half of the voltage was again making it into the vehicle chassis. So it was coming from the rear battery pack as well as the front. The rear restraints were constructed in a completely different way and were nowhere close to the cell openings.

I couldn't figure out where the electricity was making it to the chassis, but it was nearly the full voltage of the rear pack. To isolate the problem I had to remove all of the cables and reinstall them one-by-one while testing the voltage to the car chassis. Finally, I traced the problem to just one battery. Upon close inspection I found a small area of corrosion on the restraint at that battery.

I hit that area with some water and baking soda, which altered the wayward voltage. This confirmed that it was the problem area. I removed the bolts securing the restraint and lifted it up off the battery. The voltage to the chassis went to zero. Problem solved.

So, even though the problem has been diagnosed and solved for the time being, it demonstrates that my battery restraints are going to be a problem. This will undoubtedly happen again, so I am going to have to figure out a better way to restrain the batteries to keep this issue from reoccurring.

Emergency Shutoff, Link 10 Meter


Today I made a bracket and installed a choke pull cable as an emergency main breaker shutoff. This is just one of a few safety features in the event of some kind of a failure while driving.

I also ran the wires for the Link-10 meter that will monitor performance of the battery pack. The meter mounts in a little console I built a couple of months ago. The console also features a big tricked-out cup holder for a very large soft drink, which all of my other vehicles lack.

Tuesday, November 18, 2008

Update


I've been making slow progress over the past few days on preparation for the big road test.


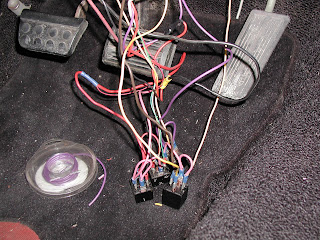
To modify the 12 volt switching control, I had to add a relay and do a little rewiring to the three that I had already installed under the dash.


I have installed most of the under hood 12 volt and 156 volt wiring. I still need to install three safety interlock relays and make the wiring all neat and pretty, but will do that after the test drive.


I have installed and wired up the battery charger. I still have to mount the input connector but will also do that after the testing is complete. I have an interesting idea on how to accomplish this.


I have mounted and wired a small 12 volt 'system' battery. This is really only used to power the system when the battery pack is disconnected. When the battery pack is connected, a DC to DC converter is used to obtain system voltage


I have mounted two 12 volt cooling fans on top of the motor controller. I had forgotten about these when I planned the control layout. Unfortunately, using the standoffs provided with the fans, they sat too high for the hood to close. I am going to solve this problem by mounting the fans at an angle.

Monday, November 10, 2008

Armed and Dangerous

I crimped on 21 lugs today and finally got the batteries all wired up. They have held a pretty good charge in the 2½ months since I purchased them. The only high voltage wiring left to complete are the two cables going from the controller to the motor.

I also received and replaced the defective contactor today, so the 12 volt control wiring is just about ready to go. In fact it's almost time for the big road test. After testing, I have lots more to wire up such as the charger, all of the metering and the safety interlock relays. I will also need to perform the adjustment procedure on the motor controller to optimize performance.

Back to Front

I wanted a safe way to get the two 2/0 cables from the rear battery pack to tie into the front battery pack. Just like seemingly everything else on this project, this became a time consuming little task. I didn't want the high voltage running through the passenger compartment. However, I didn't want to just dangle the cables under the car either.

So I fell back on my experience as an electrician oh-so-many years ago and ran a 1¼ pvc conduit under the car.


I used my plasma cutter to make a nice round hole for the pvc male adapter to go up through the floor behind where the back seat used to reside.


An LB fitting enabled me to bend the cables in a tight 90° turn.


Of course everything I do on this project ends up needing a fancy bracket or something fabricated. All it takes is a welder, a grinder, and lots of time.


I used a 90° sweep to run the cables up into the engine compartment - oops, MOTOR compartment


The cables terminate into an Anderson Connector so that the rear battery pack can safely be disconnected from the system if necessary.

Monday, November 3, 2008

Making Cables


I now have a 72 volt battery pack in the rear of the car. I'm still not quite half done making cables.

A Rant

I almost made it all the way through this project without bringing this up, but my attempt today to obtain a replacement contactor has convinced me that this must be said.

EV conversion parts suppliers - as a group - are the WORST people I have ever encountered to do business with . I have done a lot of different things in my long life, and I have never run across an industry with customer service this TERRIBLE.

Sure, it is supposedly a fledgling industry and they got overwhelmed when gas prices skyrocketed. But gas prices have been falling since July, and are now less than half of what they peaked at. Surely these companies have fewer customers by now. However, there is apparently still no customer service.

I have NEVER sent so many unanswered or slowly answered emails. I have NEVER made so many calls to businesses that just go to answering machines. I have NEVER left so many 'detailed messages' without receiving so much as a call in return. There are a few notable exceptions, but by and large this industry is full of parts suppliers that
  • do not stock the items they sell
  • require full payment up front for even long-lead-time and expensive items
  • do not answer phones
  • do not return calls
  • do not answer emails
  • do not provide necessary information for customers

Because of this constant difficulty, I would have to think seriously about ever doing another conversion. If gas remains this cheap or continues to fall, many of these no-service suppliers are going to have to find another business to be bad at.

Hit a Small Snag

In wiring up the control system, I discovered that one of my main contactors is defective. I received these about two months ago and never thought to test them - didn't think I had to. This is a bummer, man. Hopefully I will have a replacement by this coming weekend.

Wiring the 12 Volt System

After surviving a short period of being low on motivation, I finally started wiring up the 12 volt portion of the car. It's good to see the gauges and lights working again. It's like the car is coming back alive.

By the way, this is not your typical 1971 Duster. Besides the digital dash, I have installed my own version of a keyless ignition system. Bringing a specific RFID key fob close to the hidden sensor turns on the 12 volt power (obtained from a small battery). Pushing the button behind the flasher switch energizes the first main contactor and turns on the tiny pilot LED that I mounted in the flasher switch handle. This switch powers up the DC-DC converter which keeps my small 12 volt lawn mower 'system battery' charged off of the 156 volt traction battery pack. It also pre-charges the capacitors in the DC motor controller.

The original ignition switch has been removed. In its place I installed a tiny red momentary pushbutton. This pushbutton will control a set of relays that energize the second main contactor. This switch is pushed when you are ready to travel. For safety, this set of relays will not turn on the contactor unless the accelerator pedal is all the way up, the foot brake is on, and the emergency brake is off.

A small momentary pushbutton mounted behind the ashtray door is the system 'kill switch' that shuts down all 12 volt 'control' power, thus also opening the main contactors. There will also be an emergency 'kill switch' that physically attaches a control wire to the circuit breaker handle. This can be pulled in an emergency to immediately cut off all high voltage/amperage power to the motor and controller from the driver's seat.